Challah

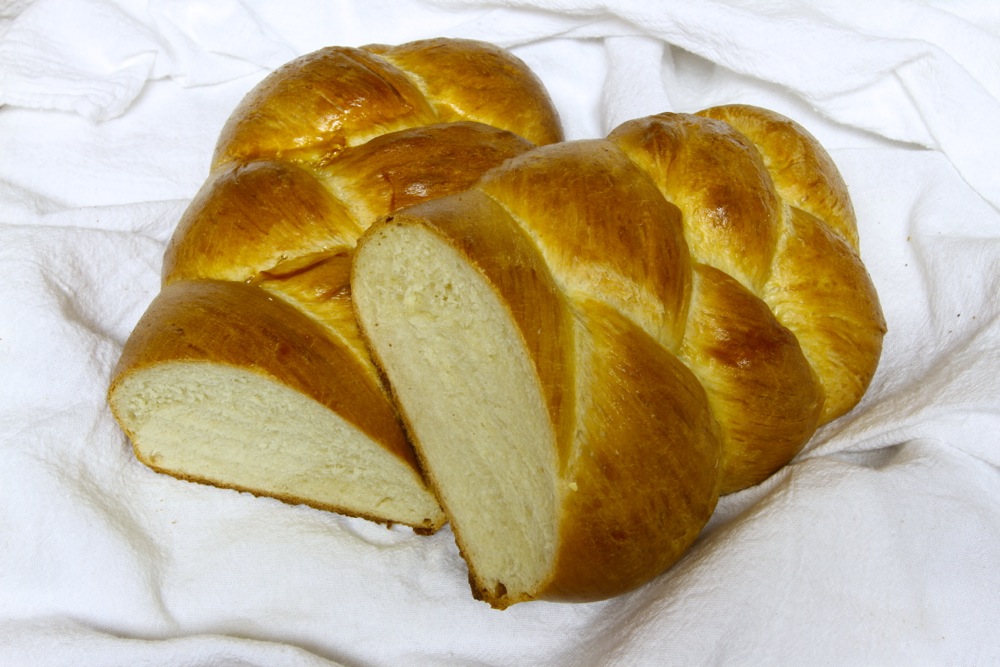
Challah (also ḥallah plural: challot/ḥalloth/khallos) (Hebrew: חלה) is a special Jewish braided bread eaten on Sabbath and holidays.

The leftovers are terrific for making french toast, and I often make this bread specifically for that purpose.

My mom used to make this every week when I was growing up, and I have very fond memories of working with her in the kitchen on Fridays to make this (not sure how much I was really helping, of course).

This version of the recipe actually comes from Cuisinart, included in the manual for my food processor. I was actually surprised by how good it was, and how closely it matches what I remember from my childhood. The Cuisinart recipe book is available online here, under product manuals (I have the Prep-9): http://www.cuisinart.com/share/pdf/manuals/dlc-2009chb.pdf

The instructions assume you have a food processor with a dough blade. For the record, I love the Cuisinart Prep-9 and would recommend it to anyone looking for a good food processor.

Makes a 1 ½ pound loaf.

Ingredients

  • 3 Tbsp granulated sugar, divided
  • 1 package active dry yeast (about 2 1/4 tsp)
  • 1/4 cup warm water (105-115 degrees F)
  • 3 1/4 cups unbleached, all-purpose flour
  • 1 1/2 tsp table salt
  • 1/2 cup cold water
  • 1/3 cup unsalted butter, melted
  • 1 large egg
  • egg glaze (1 large egg and 1 Tbsp water)
  • vegetable oil (or, my preference, olive oil) cooking spray
Preparation

In a 2-cup liquid measure, dissolve 2 teaspoons sugar and yeast in warm water. Let stand until foamy, about 5 minutes.

Insert the dough blade in the work bowl and add flour, remaining sugar and salt. Pulse to combine, about 2 to 3 times.

Add cold water, melted butter and egg to yeast mixture. With machine running, add liquid through small feed tube in a steady stream as fast as the flour absorbs it. Once dough forms a ball continue processing for 45 seconds to knead dough. Place dough in a floured plastic food storage bag and seal. Let rise in a warm place until doubled in size, about 1 to 1 ½ hours.

Place dough on a lightly floured surface and punch down. Divide dough into 3 equal pieces. Use your hands to roll each piece into a cylinder about 1 ½ x 14 inches. Place the cylinders side by side on a baking sheet coated with vegetable oil cooking spray. Braid loosely from one end. Gently pull and taper each end to a point, then pinch and tuck under loaf. Cover with plastic wrap coated with vegetable oil cooking spray and let rise until doubled in size, about 45 minutes. Preheat oven to 375 degrees F for 15 minutes before baking.

Prepare egg glaze by combining egg with water; brush over braid. Bake in lower third of preheated oven for 20 minutes. Lower temperature to 350 degrees F and bake until loaf is browned and sounds hollow when tapped, about 10 minutes. Cool on wire rack.

Honey Wheat Bread

Breadmaking is an art one can spend a lifetime perfecting, and I have only just begun! However, I was so pleased with the way this Honey Wheat Bread turned out, I figured I’d share it with you.

Thanks to Julia Child, I’ve learned that the key to getting a nice crust is steam during the first 5-8 minutes of baking! To achieve this, I used Julia’s trick of super-heating a brick on top of the stove, then placing that brick into a pan of water in the bottom of the oven, creating a burst of steam. Another tip from Julia is to line the upper oven rack with ceramic tiles to use as a baking surface.

There are so many possible variations to this recipe and approach, but here’s what I did this time…

Ingredients

  • 14 ounces bread flour
  • 6 ounces whole wheat flour
  • 10 ounces water (lukewarm)
  • 4 ounces honey
  • 2 teaspoons salt
  • 1 teaspoon active dry yeast
Other Materials
  • 1 brick (used to create steam)
  • 1 large ceramic floor tile, or several smaller “quarry tiles” (used to line the oven rack to create a baking surface)

Preparation

I’ve found that the easiest way to mix the ingredients is by weight. Using a good digital kitchen scale, equipped with a “tare” function makes the job easy. Place the bowl on the scale and press the “tare” button to reset the weight to zero. Add each ingredient slowly until the scale readout shows the desired number of ounces. Press the “tare” button after adding each ingredient so you’re measuring from zero each time.

Mixing can be done using either a food processor equipped with a dough blade, or an electric mixer. Of course, you can do it by hand too, but I will assume for these instructions that you’ll be using one of the previously mentioned tools.

  1. Add all of the dry ingredients to the food processor or mixer. Mix briefly to blend.
  2. With the food processor or mixer running, add the liquid (water and honey, combined) slowly.
  3. If using an electric mixer, mix on medium speed for about 10 minutes.  If using a food processor, mix using the “dough” setting until the dough starts to form a ball, then continue mixing for about 45 seconds to 1 minute.
  4. Place the dough in a lightly oiled bowl and let it sit at room temperature (around 70 degrees) for about 2 hours to rise, until doubled in size. The time will vary based on temperature and humidity. You can also use lower temperatures to slow down the rising process. For example, I sometimes make the dough in the evening and then leave it in the refrigerator to rise until morning.
  5. Punch down and kneed the dough, then form it into a ball again (for a boule shaped loaf, or form into other shapes as desired).
  6. Allow dough to rise for another hour.
  7. At least 20 minutes before baking, preheat your oven to 400 degrees.
  8. About 10 minutes before baking, start heating your brick on the top burner over a high flame. Make sure you have tested moving the brick before this (I use two sets of metal tongs).
  9. Rub extra virgin olive oil on the dough, then use a razor blade or very sharp knife to make slashes in a pound sign (#) formation on the top of the dough.
  10. Fill a 9 x 4 inch baking pan with water about an inch deep, then place in the bottom of your oven.
  11. Carefully pick up the brick and place it in the pan of water. Be careful, as this will cause a lot of steam!
  12. Place the formed dough on the ceramic tile, in the upper third of the oven.
  13. Bake for 30 minutes at 400 degrees, removing the water pan after the first 5-8 minutes.
  14. Reduce temperature to 375, then bake another 10-15 minutes, until the crust is golden brown. You can also use an instant thermometer to check the internal temperature. The bread is done when the internal temperature reaches about 200 degrees.
  15. Remove the bread and allow it to cool on a wire rack for at least 20 minutes.